Retrieves and Displays information from the Dataverse table Include features in canvas App

Introduction:
Microsoft Power Apps is a powerful platform for building applications that can run on a user’s desktop or mobile device. Depending on the requirements of the application, the canvas app from Power Apps might be used on mobile devices exclusively.
There are three types of Power Apps – Canvas, Model-driven, and Power Pages. The last type is now a standalone service offering more enterprise app development features. To get more graphical control, intuitive UI, and a well-placed data source, choose Canvas apps. You can check this from below link.
STEP 1:- Create a canvas app
To create a canvas app you have to choose your environment and then choose your solution . Then you have to create a canvas app. First choose your solution in that environment.

After enter in your solution click on new button in top of the power app. Then you have to choose app option then you have to click on the canvas app option.

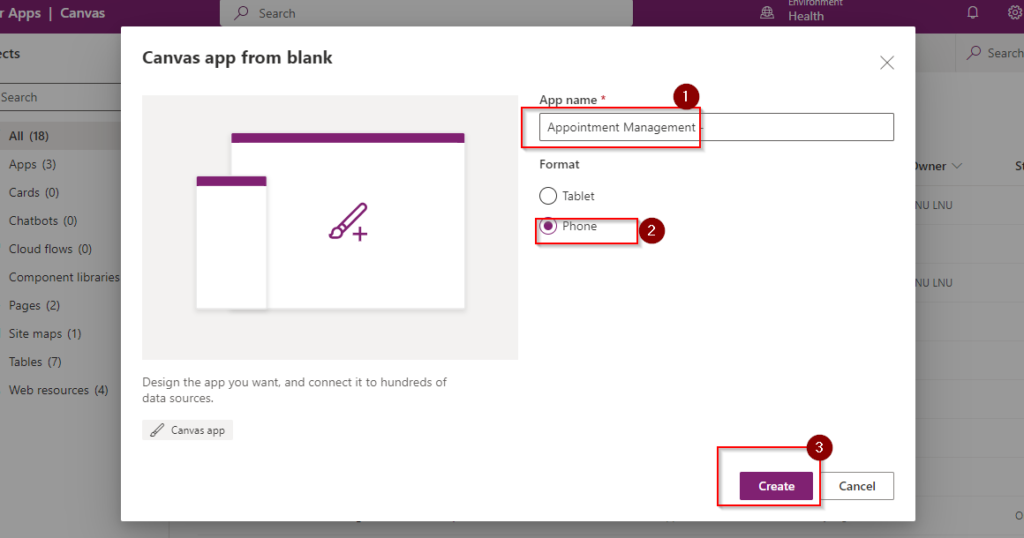
Now you have to enter the name of the canvas app name in the name field and then you have to choose the app use for Mobile or Tablet then click on create then a canvas environment will create. Then you have to create your screen in the canvas app as per your requirement.

In this scenario we have to create a page where we can retrieve data from dataverse to store the data into the dataverse . So first go to the canvas app click on Tree view then add a new screen then edit the screen for user interface so create a attractive screen for the user.

STEP 2:- Retrieve Data From Dataverse to Canvas app
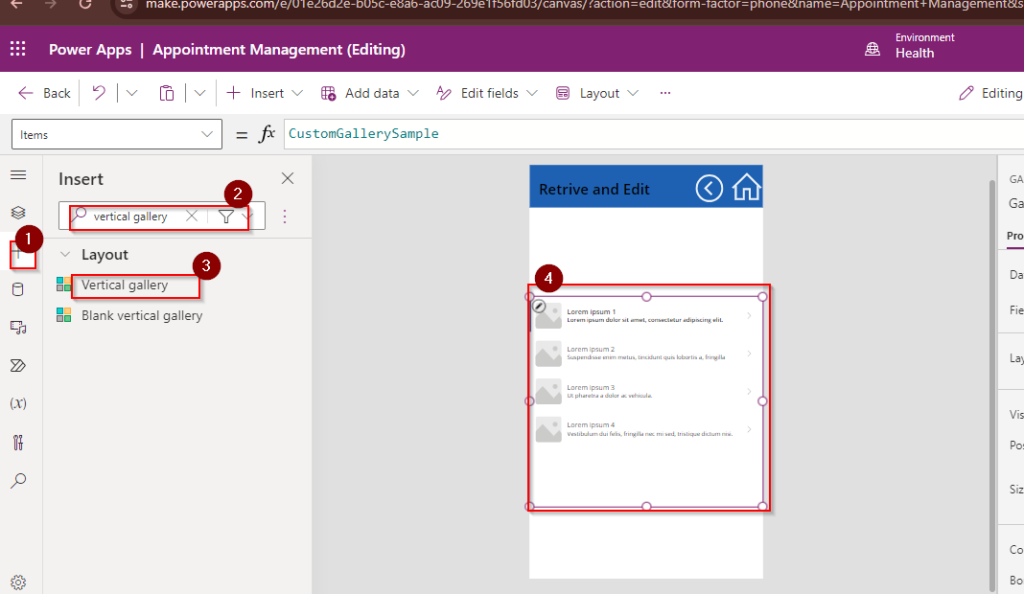
To do so we have a field where we can display the data which are retrieve from the dataverse. So create a new screen and add a gallery where we can retrieve data and display it. So click on insert option then search vertical gallery and drag it on the screen you created.

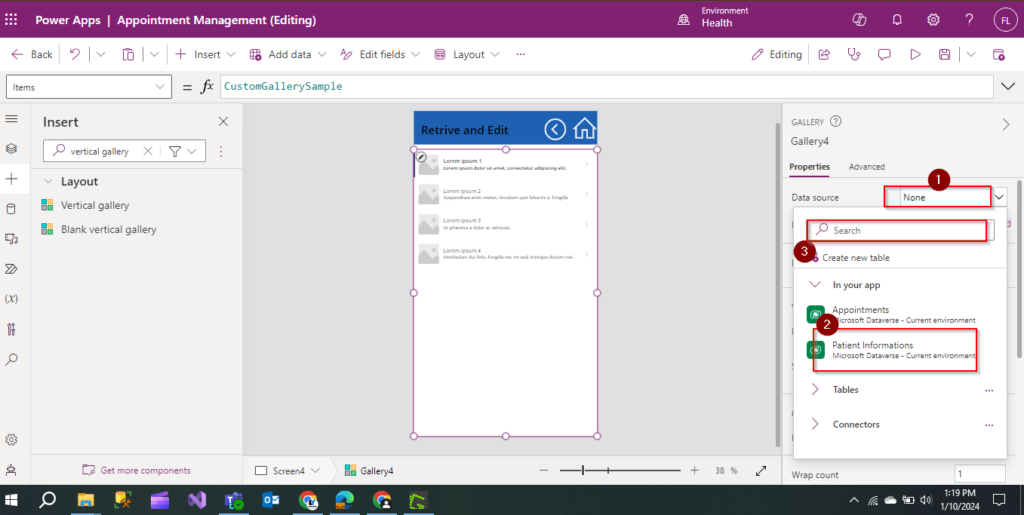
After complete this step you have to choose which table you want to retrieve in to that gallery. Choose your table from right corner of your environment in data source section then click on your table other wise you can search your table name in the search bar. Then click on your table.

Now your data will display in the gallery on your screen. To view your data in a organize manner you can select the layout of the gallery from right side of your canvas app. Then choose a layout . Then your data will display in your screen in a organize manner.

STEP 3:- Edit Data In Canvas App
Now we have data in the canvas app screen if we want to edit some data which is retrieve from the dataverse then we have to create a new screen for the edit data. So add a new screen. Then add an edit icon in the top data of the gallery then it automatically add the icon in the all column in that gallery. Now you have to add edit screen .

Then you have to add a edit form in the edit screen then you can edit the data of the record. So first add a edit form in the created screen add the table from dataverse .

clicking the data source right side of the canvas app to set the table as you given in the gallery. So that it can edit the data which is retrieve from dataverse. After choose your data source you have to edit the data field as compare to the retrieve data.

Then you have to click on the Edit icon and then you write code on “onselect” event in power fx . Here retrieve is another screen which is use to edit the data. when you click on the edit icon it will take you in to the navigated screen.

Here you can change your data and you have to click on save icon which is save your data. Click on save icon and write some code to save the form. Now you can see that data edited in the gallery.

STEP 4:- Create a Search bar in Canvas App
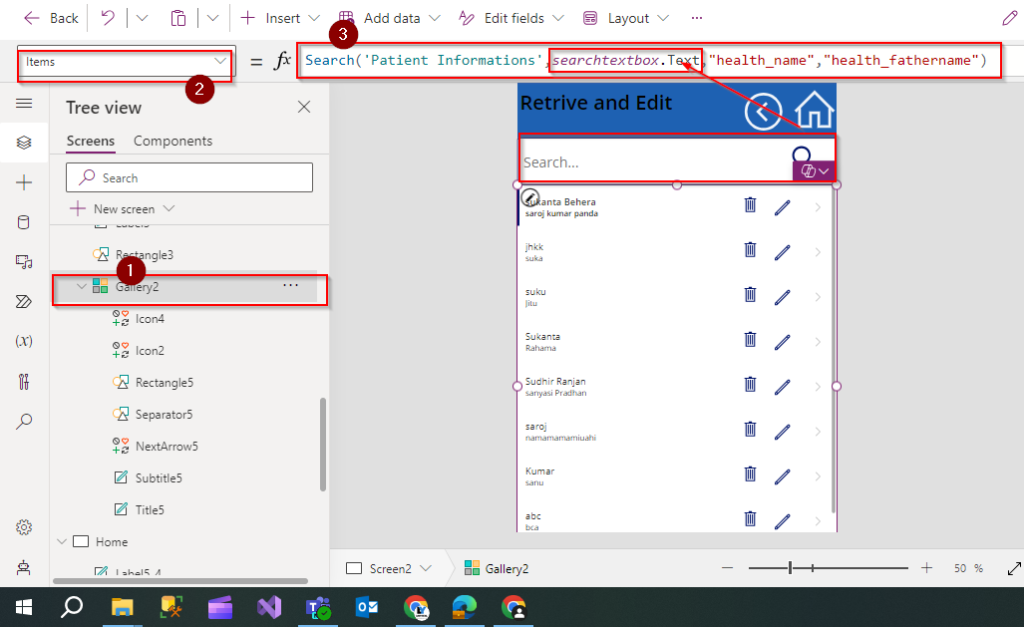
To create a search bar in the canvas app add a text input and a search icon in the top of the gallery and rename it and add some code in click on gallery . Then you have to click on the property and choose items and add code in the power fx . In this formula search is a predefine function then add table name and then you have to add the name of the text box you are taken for the search bar , then you have to add the field through which you want to search the data in the search bar.

Now you can use the search bar for search any data according to the formula. Then it will work properly.

Hope this will help you.

