
Import a sample dataset (Excel) into the previously created customer table. Ensure that the data is accurately mapped to the corresponding fields
Introduction:
Dataverse, with its robust data management capabilities, simplifies the process of importing external data into your system. In this blog post, we’ll explore a step-by-step guide on how to seamlessly import an Excel dataset into a Customer table in Dataverse. This process ensures efficient data integration and empowers organizations to leverage their customer data effectively.
this bellow you tube video link will help you.
these bellow steps are helps you how you can import excel sheet data into dataverse table.
Step 1: Prepare Your Excel Dataset
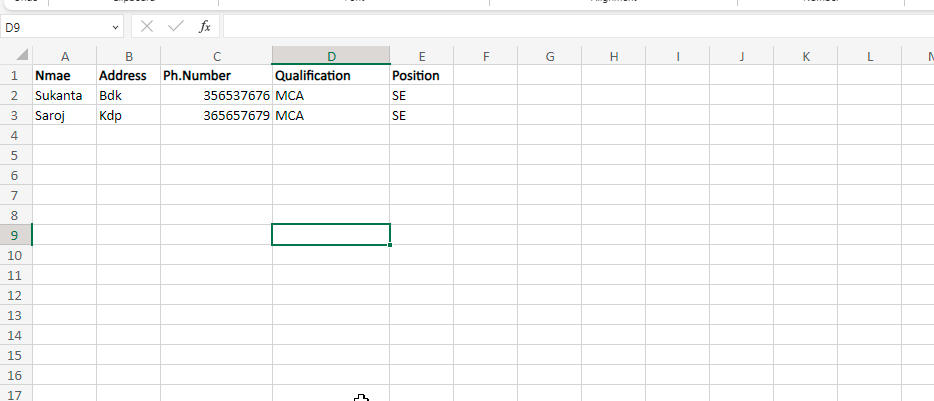
Before initiating the import process, ensure your Excel dataset aligns with the structure of your Customer table in Dataverse. Each column in the Excel sheet should correspond to a field in the Customer table, maintaining data integrity.
Step 2: Access Dataverse Environment
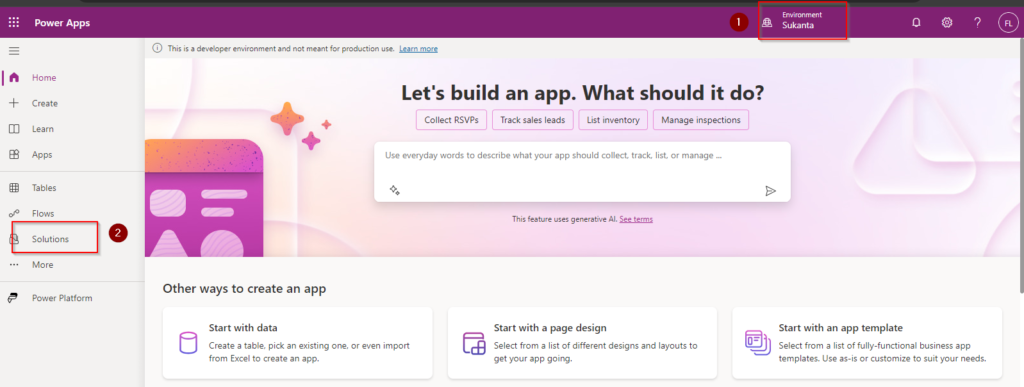
- Navigate to PowerApps.
- Open the appropriate Dataverse environment where you want to import the data.
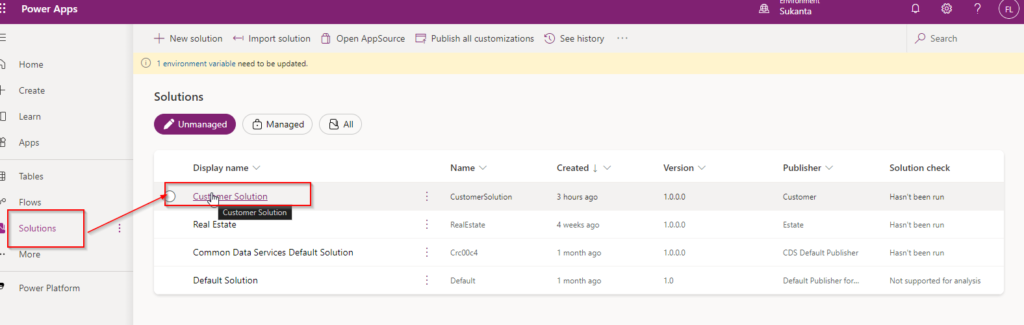
- Then go to your solution and choose your solution where a customer entity is exist.
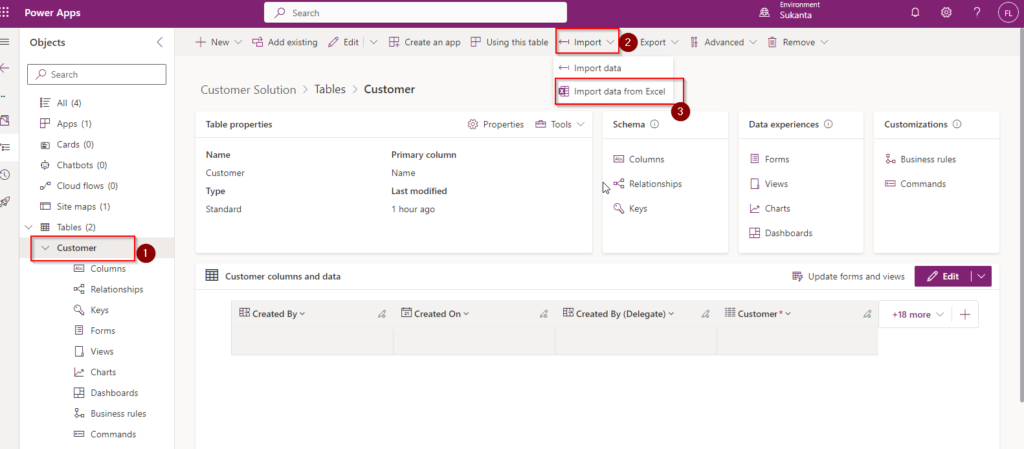
Step 3: Choose Your Table
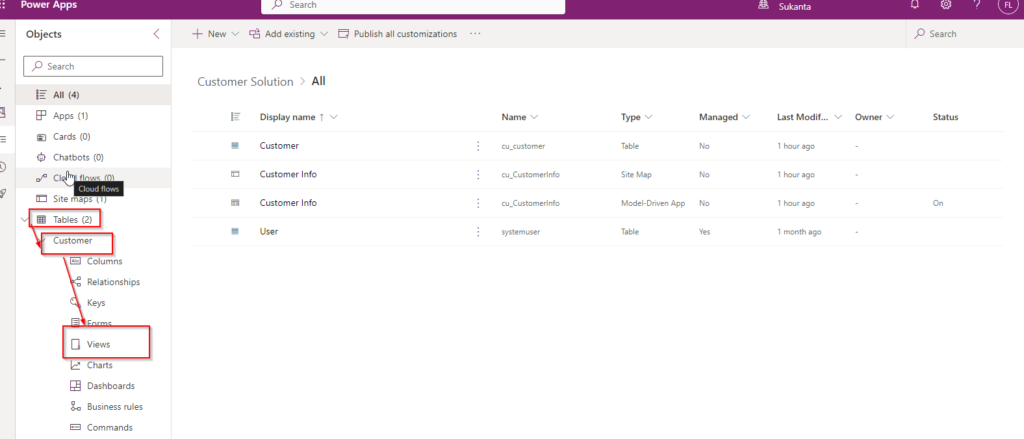
- Select the “Tables” tab and identify the “Customer” table where you want to import the data.
- Open the table to view its fields and structure.
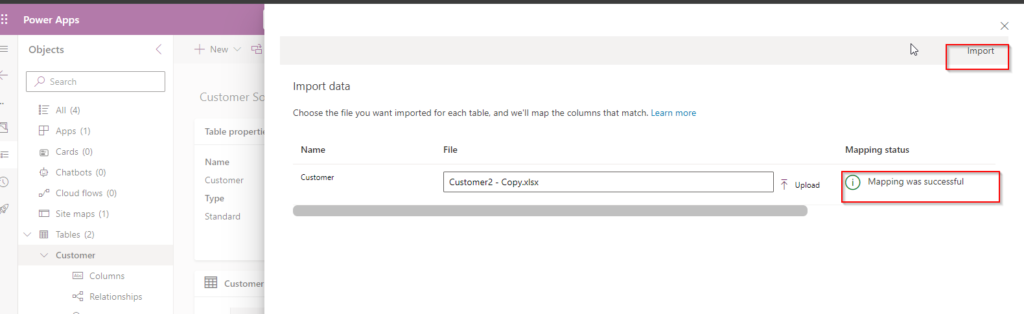
Step 4: Launch the Data Import Wizard
- In the Customer table Properties, select the “Import” tab.
- Choose “Import from Excel” as the data source.
- Browse and select the Excel file you want to import.
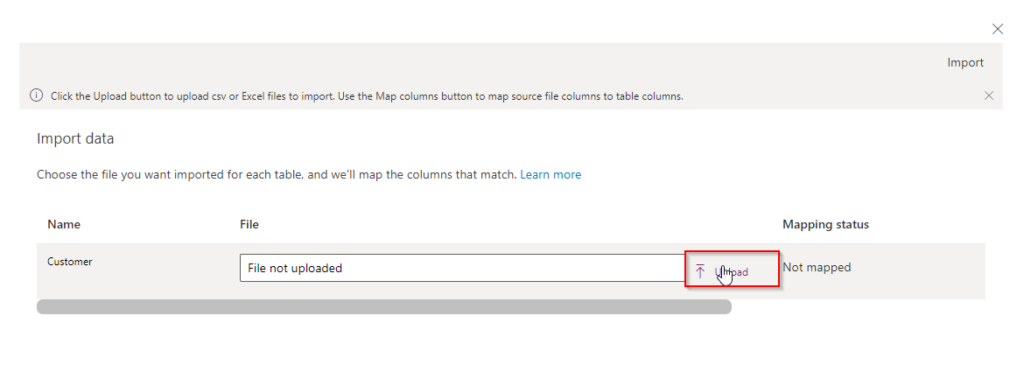
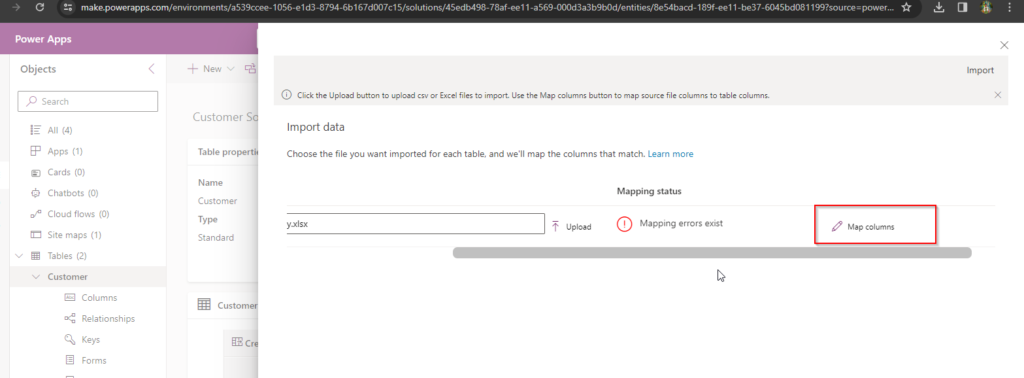
Step 5: Map Excel Columns to Dataverse Fields
- The Data Import Wizard will prompt you to map Excel columns to Dataverse fields.
- Ensure each Excel column is correctly mapped to the corresponding field in the Customer table.
- Review the data types and adjust mappings if necessary.

Step 6: Specify Import Settings
- Set import options such as allowing duplicates or skipping rows with errors.
- Choose whether to create a new table or append data to an existing one.
- Confirm the primary key for matching records during the import.
Step 7: Preview and Validate Data
- The Data Import Wizard provides a preview of the data before finalizing the import.
- Validate that the preview accurately represents your data and resolves any potential issues.
Step 8: Run the Import
- Once satisfied with the mappings and settings, initiate the import process.
- Monitor the progress and address any errors or warnings that may arise.
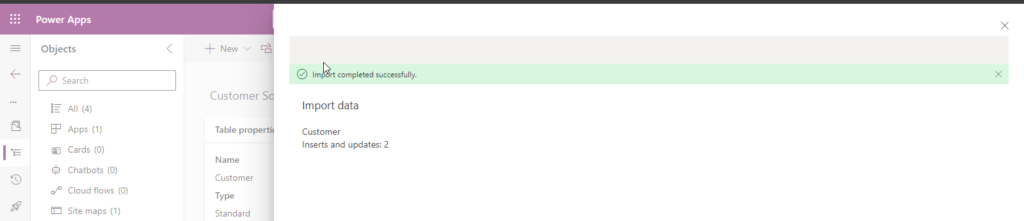
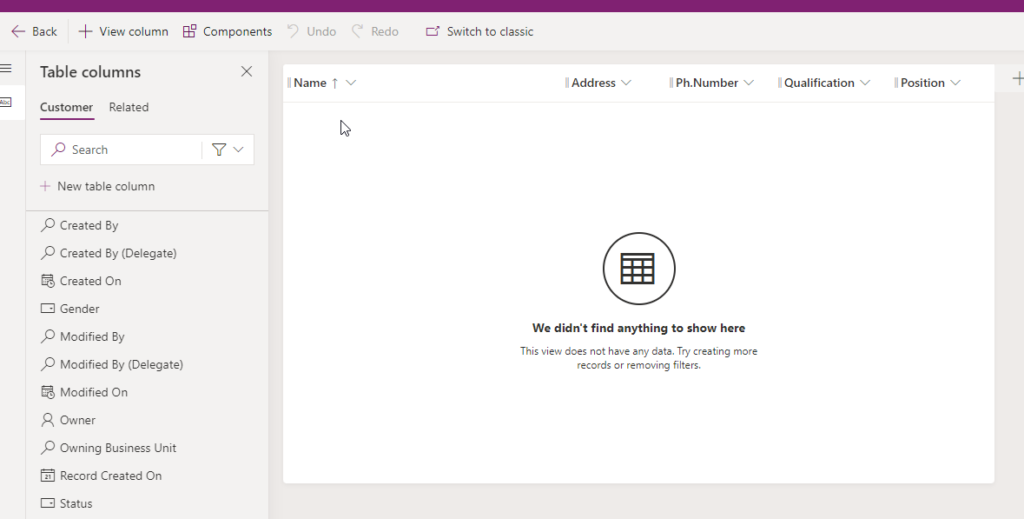
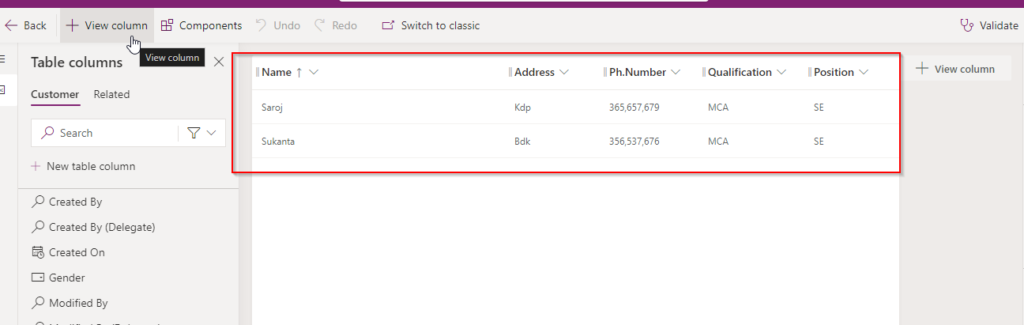
Step 9: Review Imported Data
- After the import completes successfully, review the imported data in the Customer table.
- Ensure that records and fields match your expectations so go to the table view.
Conclusion:
Importing an Excel dataset into a Customer table in Dataverse is a straightforward process when leveraging the Data Import Wizard. By following this step-by-step guide, organizations can efficiently integrate external data, maintaining consistency and accuracy within their Dataverse environment. As Dataverse continues to be a central hub for data management, mastering data import techniques becomes essential for maximizing the value of your business data.
hope it will help you.