
Open a Custom Page as a confirm dialog in Model driven app and pass parameter from the form

In Microsoft Power Platform, Model-Driven Apps provide a robust framework for building tailored business applications. One powerful feature is the ability to open custom pages as confirm dialogs, allowing users to confirm or cancel actions before proceeding. In this blog post, we will explore how to achieve this and take action upon the user’s confirmation in a Model-Driven App. To complete these task you have to follow these steps.
To watch practical video watch the below video or scroll down to read the article.
Step 1:- Create a Custom Page
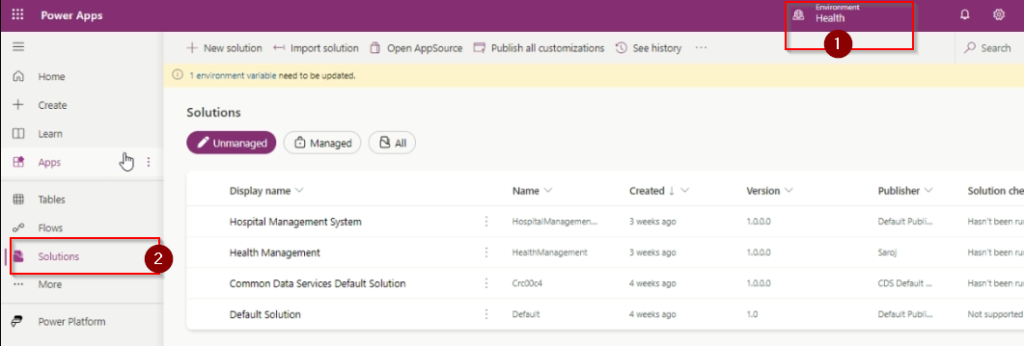
Go to make Power App and select the solution and environment . Now you have to create a custom page in model driven app. So you have to choose the environment and solution.
Then you have to create a custom page in the same model driven app. Then you have to set all the field as per your requirement.
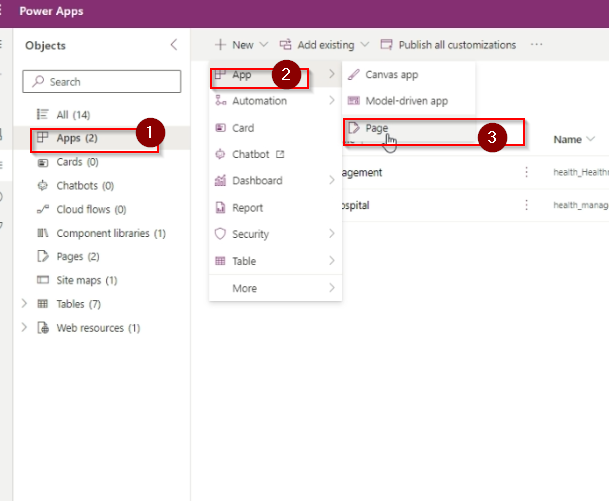
Then set the field what you want to add in the custom page. Write your code respectively. You have to add custom page to the MDA otherwise it will show some error.

Step 2:- Add PowerFX code to Custom Page
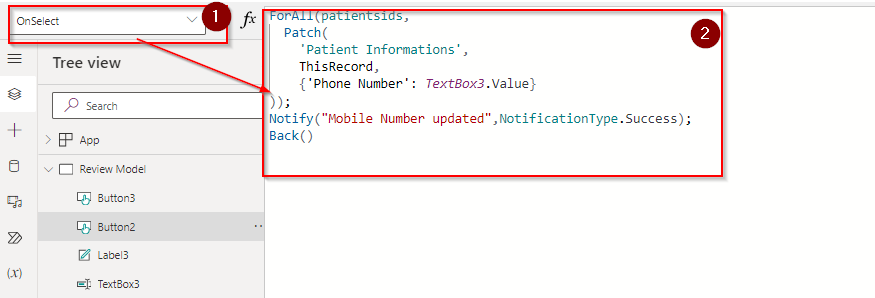
You have to add code in ok button in the custom page for the add the given data to the MDA. Where you want to add the data in column of the table .Click on your button in custom page then you have to write the code properly according to your field.
Step 3:- Add Command Button
Then you have to add the button on the top of the table where you have set. You have to first enter that app where you want to add the button. Then click on add page in that form.
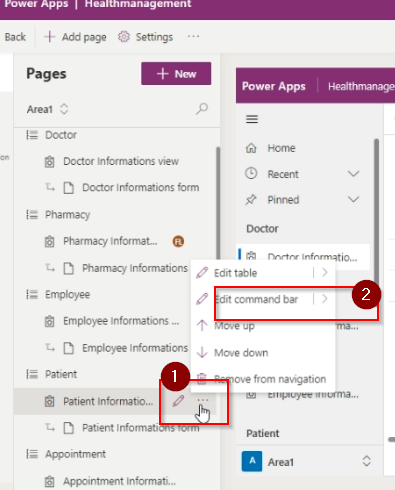
Then you have to create a new button by clicking the new and command .

Then set all the requirement as per your require. Then you have to set the name of the button , icon, action and all things. In action you set the Java Script code for the action field . We have to first enter the java script code through add library.
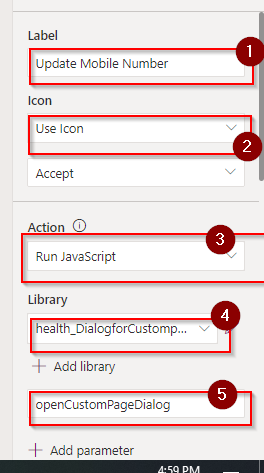
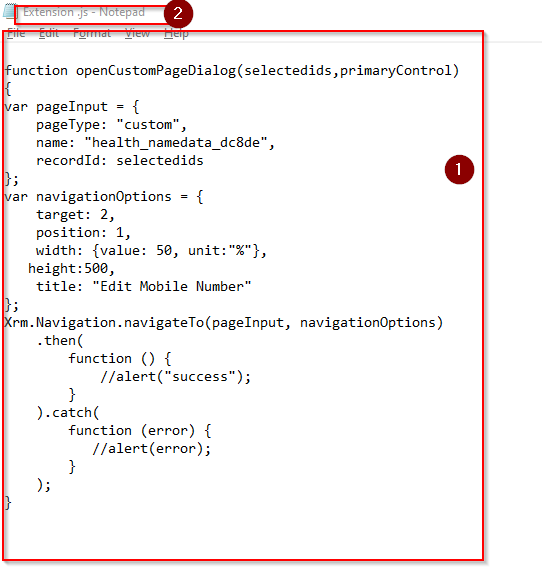
You have to add java script code for the library. You do not need about the js code i will provide you in bellow. After write the code you have to save the file as .js as file extension.
function openCustomPageDialog(selectedids,primaryControl)
{
var pageInput = {
    pageType: "custom",
    name: "health_namedata_dc8de",
    recordId: selectedids
};
var navigationOptions = {
    target: 2,
    position: 1,
    width: {value: 50, unit:"%"},
   height:500,
    title: "Edit Mobile Number"
};
Xrm.Navigation.navigateTo(pageInput, navigationOptions)
    .then(
        function () {
            //alert("success");
        }
    ).catch(
        function (error) {
           //alert(error);
        }
    );
}
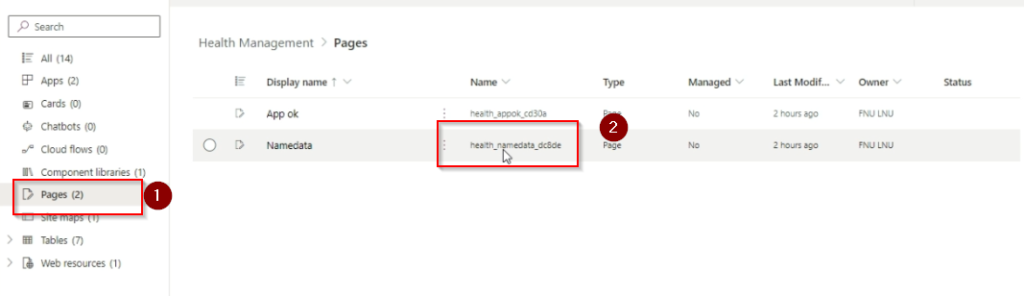
To check the logical name of the custom page you have to go to the page and then check the logical name of the page.
Step 4:-Testing the scenario
After complete all the process you have to execute the activity by clicking a record or more than one record.
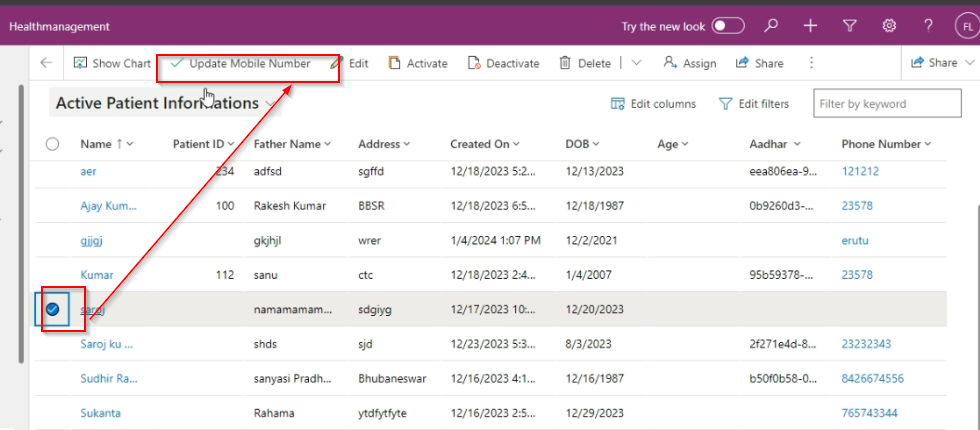
Then you can see that a pop up field will appear where you can enter the field value which is store in the MDA in near feature.

Hope it helps.